Showing posts with label recipes. Show all posts

12 February 2018

Sweets for the Sweet

Sweet treats...


because it's Valentine's Day on Wednesday, of course.

At Christmas Belle brought me some cookie cutters, which reminded me that I used to make elaborate sugar cookies for all of the holidays. Haven't done it in ages.

So it was time.

I'll take them to work, share with the neighbors, pass them out to friends.

Sugar cookies are a bit of a process since the dough has to chill so I planned on making the dough Friday night and baking the cookies Saturday morning.  Snow was forecast for Saturday afternoon so I would ice them then. What a plan.

After the dough was made, happily cooling in the fridge, I mentioned to a friend that I was making cookies and he said "Can you bake at this elevation?"
Shit.
Yes, I can but I know good and well I need to make adjustments. And I definitely did NOT make adjustments for this recipe.

(For more reading on my adventures with high altitude baking, click here and here and here.)

So Saturday morning the dough was thawed, water was added, then it went back to the fridge to chill again.

Kinda set my schedule back.

But eventually the dough was ready and I got out the world's most adorable cookie cutters.


These hands are my kids from when they were 1, 3 and 7. (Heres a link to a company that will make some for you. Fabulous baby present.)

I also have a collection of hearts although really wouldn't it have been perfect if I had THIS one?

An anatomical heart cookie cutter. 
Wish I had one yesterday.

I mean, I do work for a cardiologist.

The dough was rolled out. That required sprinkling flour everywhere. I'm a messy cook.


Rolling out the dough under the watchful eye of the plastic parakeet. 

Soon enough I had hearts and hands baked and waiting for icing.


Cookies make it easy to hand over your heart.

I had great plans. Rings for the hands, bracelets, maybe a watch. Then reality set in when I discovered the only food coloring I had was neon pink, orange, purple and green. Guess the good food coloring was lost in the move.
O well. Pink hearts and flesh colored hands, sprinkles and sugar confetti would have to do.

And the final product? Pretty cute, huh?


Literally sugar, flour and icing everywhere. 
Had to mop the floor today. 

Here's the sugar cookie recipe. I doubled it for this batch. They aren't too sweet so they really need the icing.  If you are baking at a high altitude like I am, add 2-3 tablespoons of water. I didn't add extra flour since I used flour on the rolling pin and counter (plus floor, me, cabinets, etc) when the cookies were rolled out.

Ingredients:
⅓ cup butter
⅓ cup butter Crisco shortening
¾ cup sugar
1 egg
1 TBSP milk
1 tsp vanilla
2 cups flour
½ tsp baking powder
½ tsp salt

Cream the butter, sugar and shortening. Add the egg, milk, and vanilla and mix well.
Sift together the dry ingredients and add slowly.

Chill for at least two hours or overnight. 

Preheat the oven to 350º.

Roll and cut the dough.  Bake for about 10 minutes. 

For high altitude I added a couple of tablespoons water, lowered the oven to 340º and baked them a little longer. 

Sugar Cookie Icing:
3 cups confectioner's sugar
¼ cup water
1/2tsp vanilla

I usually add a little lemon juice to the water to give it a little edge.
Mix all until smooth. It should be thick and white. Color as desired. 
To thin, add water, drop by drop. It doesn't take much. 

To decorate, I use paint brushes. Just paint on the icing. It works. Just make sure you get all the paint out of them first. 


Happy Valentine's Day all!  Wish I could send cookies everywhere.


04 April 2015

Hoppy Easter

Hoppy Easter to all....


Well, Sunday is Easter and I have been preparing.

 Love these big white bunnies from Target.
I got a couple of them.

 These strawberries have nothing to do with anything, but they are just so pretty.

 O wait! The peeps have infiltrated the strawberries.
Don't you LOVE the Peeps in half egg shells? 

 Another Target find- a bunny garland.
But, wait? Doesn't it look a little Playboy Bunny-ish? 
Or is that just me? 

And this Bunny platter. 
To die for.

Bunny has requested an Easter egg hunt (because she is only 17 and some things you are NEVER too old for).  And of course there are hopes that the Easter Bunny will bring an Easter basket.

But mostly she has requested Easter breakfast for her and the friend boy.
And a specific breakfast.

French Toast Roll Ups.
Never heard of them? Me either.  


So I looked them up and practiced and Wow! That girl is on to something.
They are yummy.


French toast filled with strawberries and cream cheese.
Or cream cheese and cinnamon/sugar.
Yum.

And in the interest of making everyone's Easter morning happy- or at least sugar filled- here's the basic recipe.  Pretty much you can fill these with anything.  Nutella? Bananas? I'm doing strawberries and blueberries.


French Toast Roll Ups

Ingredients
  • 8 slices white sandwich bread (For some reason I have a loaf of sliced Italian so I'm using that. Sourdough might be yummy ,too.)
  • softened cream cheese, diced strawberries, blueberries, or whatever
  • 2 eggs
  • 3 tablespoons milk
  • 1/3 cup granulated sugar
  • 1 heaping teaspoon ground cinnamon
  • butter, for greasing the pan 
Instructions
  1. Cut the crust from each slice of bread and flatten it out with a rolling pin. (Or a wine bottle if you are at my cabin.)
  2. Place about 1-2 teaspoons of your chosen filling 1 inch from one end of the bread in a strip. Roll the bread up tightly and repeat with the remaining pieces of bread. The cream cheese really gives it that added Yum so don't leave it out.
  3. In a shallow bowl whisk the eggs and milk until well combined.
  4. In a separate shallow bowl mix the sugar with the cinnamon.
  5. Heat a skillet set over medium heat and melt a tablespoon of butter.
  6. Dip each bread roll in the egg mixture coating well and then place them in the pan seam side down. Cook in batches until golden brown, turning them to cook and brown on all sides, about 2 minutes per side. Add butter to the pan as needed.
  7. Add cooked rolls immediately from the pan to the cinnamon sugar and roll until completely covered in sugar. Serve with maple syrup for dipping or just on their own.


Have a wonderful Sunday!

17 September 2014

A Recipe from the Blue Ribbon Winner

Blue Ribbon Baker, Blackberry Crumb Bar

After hearing her mom had been declared a Blue Ribbon Baker,  Bunny sweetly asked me to make some Blackberry Crumb Bars for her.  She had found a recipe online and sent me a text saying "Can you make these at some point please".   Notice the "please". That's about as sweet as we get around here.

Now baking in my tiny kitchen in the woods can be a challenge. Appliances are limited. Gadgets are even more limited. Heck, space is limited.  The handy dandy hand mixer we have is at least 30 years old. There's a food processor from the consignment store. It has two speeds: on and off.
I also learned to bake at sea level. This kitchen is almost 8000 feet in the air. Concessions need to be made and I am doing my best to learn how to make them. Some things come out, some things don't.

I've written a couple of posts on baking and cooking in our version of a Green Acres kitchen. If you want to read about my little kitchen, click here.  If you want to read about high altitude baking, click here.

The cozy kitchen in the woods.
Just don't plug in a 3 and a 5 at the same time.
(And if you have never watched Green Acres- go find it online.)

But the Crumb Bars got made.  And devoured. They were yummy but we felt they could be improved upon. So more were made. I think we have it right this time.

See for yourself:


Blackberry Crumb Bars


The cast of characters-minus the oatmeal and graham crackers
I forgot to take a picture the second time I made them. 


For the filling:
  • 4 cups blackberries (Frozen is ok) 
  • ⅓ cup granulated sugar
  • 2 Tbsp lemon juice
  • zest of ½ lemon (No micro plane here in the cabin kitchen, so I used one of those choppers that you slam down with the palm of your hand. Worked ok. Necessity is the mother of invention.)
  • pinch of salt
And for the pastry:
  • 1 1/2 cups all-purpose flour
  • ¾ cup oatmeal  (I chopped it up just to make it a little finer but you don't have to.)
  • ¾ tsp baking powder
  • ½ tsp salt
  • 1 cup unsalted butter, cold and diced into cubes (Or just melt it. I tried both ways and both ways worked.)
  • ¾ cup granulated sugar
  • 1 large egg, well-beaten
  • 2 tsp vanilla extract
  • 5 or 6 graham crackers-crushed
Place rack in center of the oven then preheat to 350 degrees. Coat a 13" x 9" cake pan with cooking spray or line with parchment paper then set aside. (I lined the bottom of the pan with parchment paper/sprayed the edges with Pam.)

In a medium-sized mixing bowl, toss blackberries with sugar, lemon juice and lemon zest until well combined then set aside.  (Frozen blackberries were used- didn't even bother to defrost them.)


Doesn't this look yummy? 

In a separate large mixing bowl, sift together flour, oatmeal, baking powder and salt. Cut the cold butter into flour mixture using a pastry cutter or fork until the mixture resembles coarse crumbs, then add ¾ cup granulated sugar and stir until combined. (Since there is no pastry cutter here at Green Acres,the first time I made it I used the ancient hand mixer on low. It worked. The second time I just melted the butter and stirred it all together. That worked too.)

In a small bowl, whisk together the beaten egg and vanilla then add to dry ingredients. Mix until well combined—the mixture will be dry and shaggy-looking. (Shaggy-looking? It was dry. Don't know about Shaggy. And if you decide to melt the butter- it won't look dry. But it will still work.)


 This is with the butter melted. 
It was a lot easier to do than "cutting in cold butter".
An option if you also happen to be lazy. Like me.


Transfer 2/3rds of the pastry mixture to the bottom of the prepared pan then press into an even layer. 
Add an even layer of the crushed graham crackers. (Use about 2/3rds of the graham crackers here, save  to add to the topping.) 


I find a wine bottle and a plastic baggie the perfect set up 
for crushing crackers. Put the graham crackers in the bag, roll the bottle over.
Feel free to sample the wine after you are done crushing.

Pour blackberry filling—including juices—over the crust then spread into an even layer.

Mix remaining graham cracker crumbs with remaining pastry mixture and crumble evenly over the top of blackberries. 


Ready for the oven.

Bake 40–45 minutes until the top becomes a light golden brown. Remove from oven then allow to cool until crust becomes firm. Serve slightly warm, or at room temperature.

Lightly browned all over at about 46 minutes. 

No adjustments were made for the high altitude and it didn't seem to matter. 
Bunny declared these "Yummy" and requested that they be made with great regularity.


Yum. 
I'm going to a Wine Festival in Lake City this weekend. These can come along with me.  
Of course, I will leave some for Bunny. 
Maybe. 

 (The original recipe was courtesy of the website CherylStyle.com BUT alterations and additions were made.)

30 July 2014

No. 41:Enter Something into the Fair

No. 41: Enter something into the fair- either the Ft. Bend County Fair or maybe even the Chaffee County Fair


I know, I know.

Everyone assumes I have totally forgotten about my 60 challenges since I have worked on exactly zero of them this summer.

But that is not true.

Just last week while I was in Colorado I knocked out No. 41: Enter something into the fair.

The official fair handbook with
entry requirements. 

Now, I confess.   I entered.   I don't know yet if by some miracle I won anything but that wasn't really part of the challenge.  Just entering was.

The Chaffee County Fair and Rodeo is always the first week in August and is held at the Chaffee County Fairgrounds in Salida.


Fair grounds entrance.

For the fair there are Open Class Divisions for textiles, hobbies, crafts, fine arts, photography, horticulture and floriculture.
The rodeo includes bareback riding, barrel racing, team roping, steer riding, mutton bustin', carriage driving, calf branding, hay stacking and trailer loading contests. You know, rodeo stuff.
There's also a "Best Decorated Rock Contest" for the 12 and under set. The rock must be picked from the fair grounds.

I entered the SENIOR Class 13- Cookies (rolled) Baking Division.  (Senior?! WTF?)
And my recipe of choice?
Dark Mocha Rum Balls.  (Hmmm.  Just realized they weren't really baked. Bet that counted against me!)
Six cookies, in a plastic bag on a paper plate.
I followed all the entry rules.


And why did I decide on rum balls of all things?
Because entries could be turned in on Saturday or Sunday for judging on Monday.  But Sunday was spent in Gunnison having lunch with my friend Liddy.   So that meant I needed to turn those cookies in on Saturday.
Which got me to thinking. What gets better with age after making? Regular cookies can dry out. Pies get soggy.
But rum balls? Rum balls just keep getting better and better.
Besides,  if you were judging, wouldn't you appreciate a little shot of rum in your otherwise humdrum Monday morning?

Besides, I didn't have a whole bunch of time to experiment. This was a bit of a last minute decision.

So rum balls were entered.

Me, leaving the Fair Grounds drop off building.


Judging was Monday morning, the same day we left town and headed to Denver for the night.
I have no idea if I won a ribbon or not. Guess I will have to wait until after this weekend when the entire fair results are listed in the paper.

And if I won, what would I get?
Are you sitting down?
Besides a ribbon, "premiums" are also awarded.
Grand Champion gets $3.00!!!
A Blue ribbon gets $1.50.
And the lowly White ribbon gets a measly 50¢.

Kind of breaks my heart knowing I won't be there to collect my winnings.
(That's also assuming I was the only entry in that class/divison- most probably the ONLY way I could actually win.)

No. 41 was entered.


And if you, too, want to make my (possibly) Prize Winning Dark Mocha Rum Balls, here's the recipe.


The cast of characters.
(Don't you love my ancient $8.00 food processor? Got it at Free the Monkey, the resale store.)


Ingredients:


65-70
 vanilla wafers, finely crushed (about 2-1/2 cups crumbs)

1
cup  powdered sugar plus an extra ½ cup (divided evenly)  for coating

1
cup  finely chopped pecans plus an extra ¼ cup for coating

1/2
cup  (1 stick) butter, melted

2
Tbsp.  light corn syrup

2
Tbsp.  unsweetened dark cocoa powder

1/4
cup  coffee rum  (I used Brinley's Gold Coffee Rum from St. Kitts. A substitute would be 1 tsp. instant coffee mixed into ¼ cup rum and allowed to sit for 15 minutes or so.)


Mix all ingredients (except extra powdered sugar and extra crushed pecans) together.
Shape mixture into 1 inch balls. Mix ¼ cup reserved crushed pecans and ¼ cup reserved powdered sugar together. Roll balls in the sugar/pecan mix.
Store overnight in tightly sealed container, separating layers with wax paper if necessary.
The next morning, roll balls one more time in the last extra ¼ cup powdered sugar.

Keep stored at room temperature. These improve with age!! Don't eat them all at once.


10 July 2014

No. 46: Have a dinner party

No. 46: Have a dinner party  (Rethought.)


My original concept of No. 46 was a lovely dinner party with six to eight erudite friends gathered around my graciously set dining room table, crystal sparkling, silver shining and me charmingly serving a tasty and beautifully prepared meal to a symphony of oohs and ahhs.

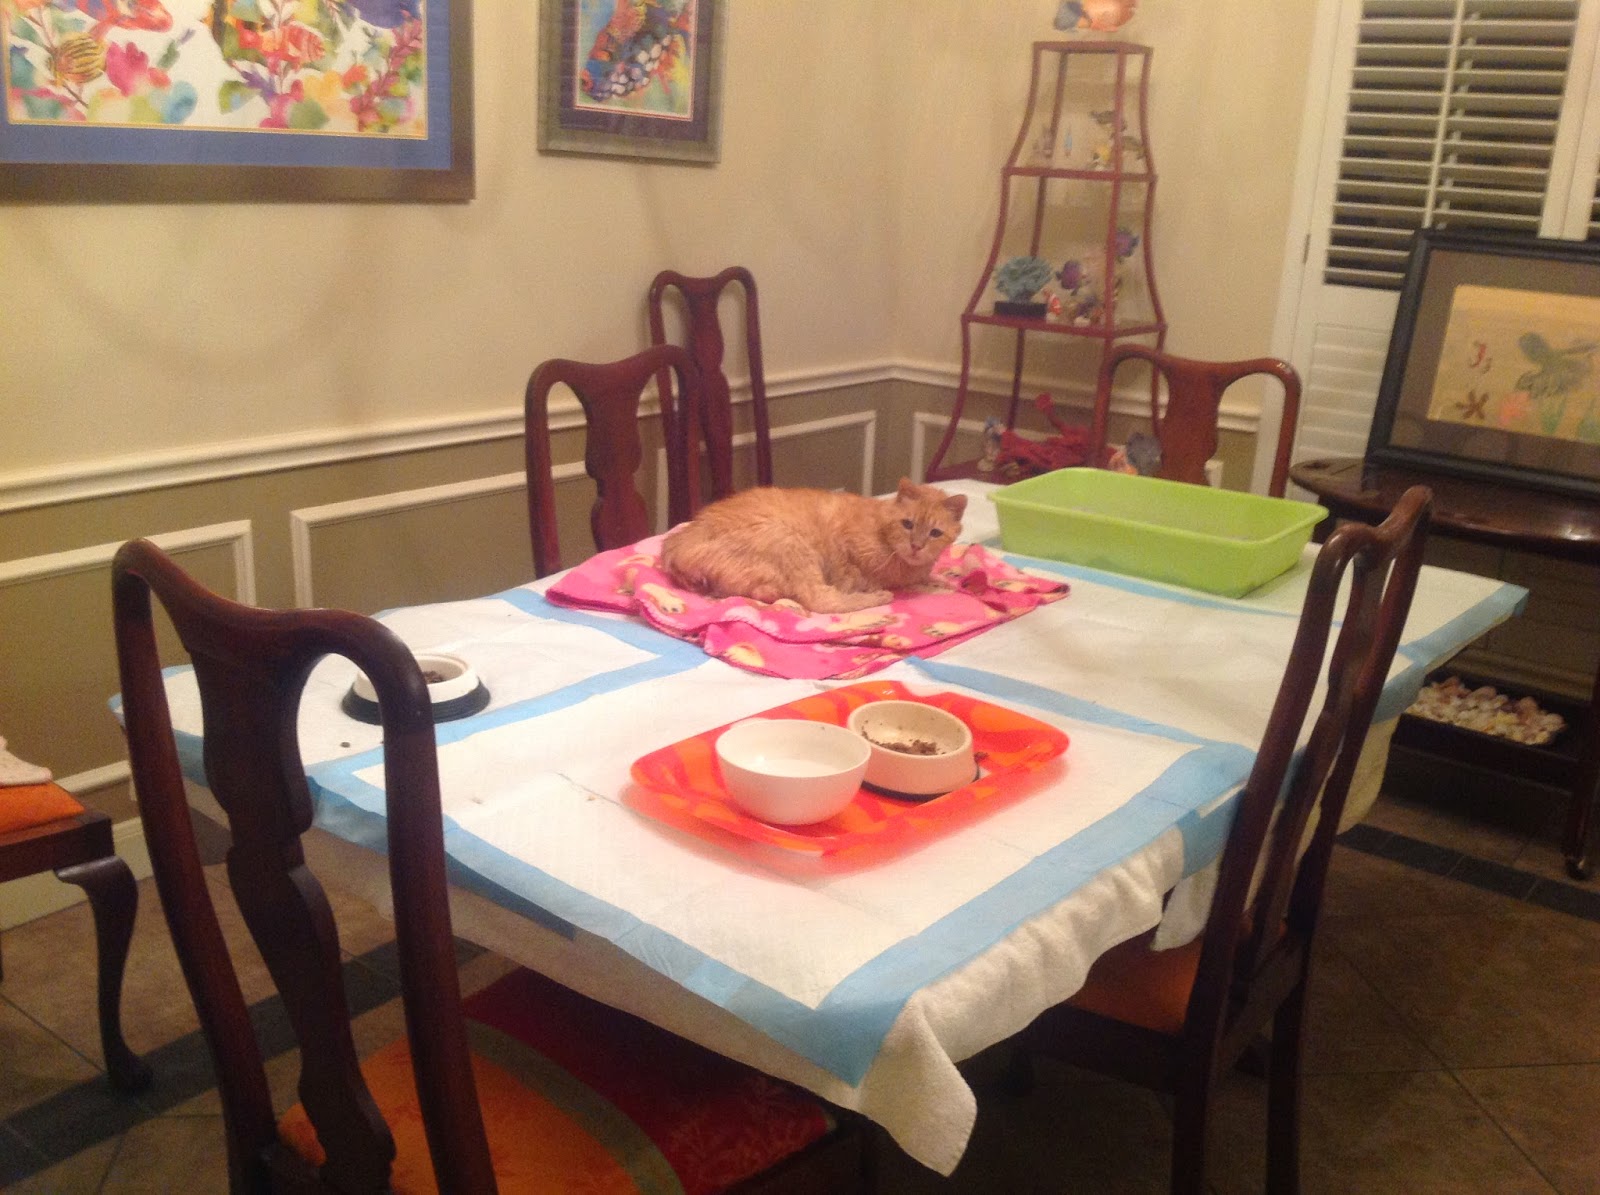
The reality of my dining room these days is this:

Not exactly the place setting I had in my mind when I chose all the wedding china a gazillion years ago.

I have a centerpiece cat.

This is Max. He's a manx. (No tail. Never had one, never was supposed to have one.)

Max back in the day. 
Wasn't he adorably awkward? 

He is 20 years old. His back legs are wobbly. Carlos would like to play with him which just makes Max anxious, so he has been given safe haven on the dining room table. Sadly, he lives there 24-7. I say sadly because I would prefer he not be the first thing you see when you walk into our house. I don't think Max is sad about it at all. Max feels safe up high on his own private island.

I had bunko last night at my house. Dinner for 12 women along with drinks and dice throwing and more drinks and laughing and then yelling. Then dessert, prizes and water to rehydrate everyone.

Does that count as a dinner party? I'm not sure.

Certainly I fed 12 people. The crystal and silver were used. My friends are definitely educated and well informed.

The crystal was placed by the wine with care...
And let me just mention how much I HATE that tile backsplash. 


The centerpiece cat and his island table were moved into the office, the door closed and a substitute table was thrown into service. That cat table won't be eaten off of again until it has been refinished.  The table was my grandmother's. Sorry, Nanny. It does deserve a better life.


But I've also been thinking about a little dinner I had before I left Colorado.

My neighbor and new friend, Sue, was over and mentioned she had some tamales she needed to eat. She was trying to clear out her fridge before she headed back to Texas. Turns out, so was I.  My fridge had avocados. And beer. There were chips in the pantry.

That sounded like dinner.

So I told her to bring her tamales over. I made up a chili sauce for them and some guacamole.
We had some beers on the front porch, then moved indoors for tamales and guac. We laughed. We drank. We ate.

I think we used the enameled tin plates that I inherited from my sweet friend Liddy's mom, Verlyn. (Read about her, here.) "Gimme" Koozies encircled our beer cans.   Carlos did the dishes. (Ok, maybe just the pre-wash.)

Enameled tin plates. Love them. Have some old, some new. 
But the red rimmed white ones have the most sentimental value.

Does that count as a dinner party? Again, I'm not sure.

But you know what?
I'm saying YES.
These were dinner parties.

I think more than anything my time away from my real life has made me realize that things are not as concrete as I once believed. There are possibilities. I can make things happen. The limitations that I perceive are just that: perceptions.  

It also got me thinking about what we need in our lives.      
I have so much stuff.
Or does that stuff have me?
So I'm doing a little informal surveying regarding the "stuff" that we "need".
That post next week.


...................


And if you need an easy recipe that expands to feed 12, here it is, courtesy of my mother and the Houston Chronicle.

Romantic Shrimp Fettuccine

1 ½ sticks butter (this is what it calls for- I use about half that much)
4 stalks celery, chopped
½ green bell pepper and ½ red bell pepper, chopped (or all one color, doesn’t                                                                                         matter)
1 bunch green onions, chopped  (I always forget these, no one has complained yet)
2 to 3 garlic cloves, minced
1/3 cup flour
½ cup water
2 lbs. peeled, deveined shrimp (frozen works)
4 Tbs parsley flakes
1 lb. Velveeta Mexican cheese
1 pint half and half
1 lb fettuccini noodles, cooked
Parmesan cheese

Preheat oven to 350. Butter a 9x13 in. casserole dish

In a large skillet, melt butter and sauté celery and bell pepper until tender. Add green onions and garlic and sauté 5 minutes. Sprinkle in flour and mix well. Cook 5 minutes on very low heat.
Add water- mixture will become very thick. Add shrimp and parsley- mix well. Cook another 5minutes. Add Velveeta and when melted, add half and half. Put noodles in prepared dish. Pour shrimp mixture over noodles. Sprinkle with Parmesan cheese. 

Prepared as is this feeds 8-10. To stretch it to twelve I add another pound of shrimp, throw in a little extra fettuccine noodles and use a larger casserole dish. And still I have leftovers. 

I could not find the Mexican Velveeta yesterday so I just used regular and I think it turned out too “cheesy”.  I think the next time I would try the Velveeta Queso Blanco. Or possibly half of each. 

Bunny even suggested I make it with chicken next time. She isn't a fan of shrimp. Silly girl. 

12 February 2014

A Little Chemistry...


Chemistry Class: The kind you can pass.


I've been slacking on the challenges.  O well.
They'll get done.

I've actually been chatting with my friend, Cherrilla, about No. 10: Start a business that makes money.
But that's as far as we've gotten.

And I believe brunch is on the menu during a late March trip to New Orleans. That's No. 21: Go to brunch.

At least there is some planning going on.

But this post is about chemistry.  Timely since I have just come from parent/teacher conferences and one of the girlies (who shall remain unnamed) apparently is not doing too well in Chemistry. Hmmmm.

Except I'm talking about FUN chemistry here, not the kind with equations.
The kind of chemistry that ends up with something yummy to eat.

Because really that's all baking is, just chemistry.

And I love to bake.

Yesterday I cleaned out the fridge and realized there were some very overripe bananas in there.
So of course I had to make banana bread.

Here's the cast of characters for the bread:


See? Those are really ripe bananas.

Except the recipe calls for two eggs and I only had one. So I had to stop everything and drive 20 miles to the grocery store for eggs. And 20 miles back.

Then I made a huge mess in the kitchen because that's just how I roll.

A little blurry, a little messy. 
But the results are worth it.

And then I ended up with this:


Not a food photographer, I confess. 
But the counter is clean and the banana bread is yummy.

This is the best, most moist banana bread ever.  
At least in Texas it is. 
Since I'm in Colorado above 7000 feet I still need to figure out the secrets to high altitude baking. With this recipe I've been adding 1/2 an egg more and that seems to help. 

So here we go:    
Best Banana Bread

Ingredients:
2 cups flour
1 tsp baking soda
1/2 tsp salt
8 Tablespoons butter softened. (That's one whole stick of butter. A quarter of a pound. Yum.)
1 cup sugar
2 eggs  (or 2 1/2 eggs if you are doing the high altitude thing)
1 cup ripe mashed bananas (about 2 large ones)
1/3 cup milk
1 tsp. lemon juice
1 cup walnuts

Preheat the oven to 350°.

Sift the flour, baking soda and salt together. (Or do what I do, stir them up a bit and call it a day.)
Set aside.

Cream the butter and sugar together.
Add eggs and bananas to the butter mixture.  Blend thoroughly.

In a separate bowl (ok, this recipe does use a lot of bowls) combine the milk and lemon juice. 

Starting and ending with the dry ingredients, alternately blend the dry mix and the milk mix into the banana mix. 

Throw in the cup of walnuts. 

Mix up all the mixes. 

Pour it all into a lavishly buttered 9x5 loaf pan. 

Bake for one hour. 

Yum. 

You're welcome. 

And for your entertainment, a Vine starring this very same banana bread being made in Texas.


If you are curious about the differences between my Texas kitchen and my Colorado kitchen, click  here for that post.

And if you have any suggestions for high altitude baking, please let me know.