Showing posts with label paint. Show all posts

12 August 2020

Cabin Fluffing...

Cabin Fluffing....

Last week I spent some time at the cabin getting it fluffed up. Still unsure if the final plan is rent or sell or live in, but no matter what, there are always things to be done in a house.  

First up was glue the closet door back together upstairs. Now, not one door in this house matches another. This closet is under the eaves so the door has been cut down to fit the opening. Over the years it had been sticking, the parts came loose and then it really stuck which meant basically you had to hold the door together as you opened it. 

The upper right side of the door always hung behind while the rest opened up.

This should have been an easy-peasy fix. Pop the pin out of the hinges and pull the door off to glue it.
But no.  Look:

Yep. Some genius chiseled out a spot in the wood for the hinges, making it impossible to remove the door without completely removing the hinges.

So, off with the hinges. And the door.  Liquid Nails to the rescue and Voila! door repaired. 

Next up was the side mud room door.  

Pretty rough shape...

The wood had not been painted on that door for easily 15 years, possibly longer. Talk about weather beaten. I started to sand it but realized there would be no door left if I got rid of all the grain. Instead I patched, sanded a bit, and primed it.

Primed and ready for paint. 
Yes, I was lazy and didn't even bother to remove the door from the hinges. 

Two coats of paint later, look!!  Gives the whole side of the cabin a finished look. Bunny says it looks very outdoorsy and reminds her of REI. I guess that's good.

Slowly getting away from the completely neglected look.
Notice my deer planter is wearing his mask.
They are mandatory in Colorado.

Since the mud room door was spiffed up I decided to move on to the shelving unit in there. This shelf came with the cabin and was painted/stained a dark brown with lots of paint marks and scratches. Ugly but very serviceable. 

An oldie but goody of Bunny and the mud room shelf.

I used this opportunity to get rid of all the half used/almost empty cans of Chalk paint by mixing everything together. The end result was a very pretty green/teal and Whoa! what an improvement. 

So much brighter and happier looking.

On a roll, I hung a sign that had been at my parent's house(s) for a million years. I believe the San Antonio neighbors gave it to them back in the 1960s.  Made in memory of a San Miguel trip, I'm sure. When Mom's house was sold, I couldn't bear to leave it behind. Instead of hanging over the garage door, it now graces a spot over my basement door.

I'll have to get the accurate history behind this sign.
For a good 40 years I thought the words were burned into the driftwood. 
Maybe five years ago I realized they were just written on with a black Sharpie.

And, to highlight the week of fluffing, I got a call from the septic company. SO EXCITING! After being on the waitlist for almost a YEAR, they are finally coming out. When we bought the cabin it had been empty for a few years, the owner was in hospice, the wife didn't even know where the septic clean out was, so we (foolishly) said...no worries, it all works now. Eleven years later I have tried on my own with the metal detector to find the clean out with zero success. Nightmare septic system stories got me motivated to have it found. Best to be proactive with these kinds of things. 
Sooooo....sometime tomorrow Mountain High Septic will come do their magic. I hope. Crossing my fingers. Hate dealing with the unknown. Everyone say their prayers for me. A good septic system is awesome. a failing one is an expensive mess. 

Here's to a fluffed cabin and an empty septic tank. Everyone have a great week and wear your masks. 


05 February 2018

Ms. Handy Man?

Ms. Handy Man? 


At the rate I'm going, I'll be able to take this cabin apart and put it back together all by my lonesome.

The most recent home repair? The back door knob (lever)  was coming off. Easy enough it would seem. I already knew the basics.


 The outside was loose...

 But the inside was dangling.
I know for a fact those screws inside should not be visible.

Undo the set screw, remove the lever, remove the trim, tighten everything up and reverse.


So that's what I did. And guess what?   The door wouldn't lock. It was nice and secure, but it just wouldn't lock. Hmmm.

A quick text to my contractor friend and I had the answer. Look at the online manual.  Ok, that wasn't what I wanted but he also pointed out that some doorknobs require you to assemble them with the key inserted.

I did check the online manual and it was clear as mud. Some vague photos but one pic did show a key inserted. And then it showed the key turned. So was that explaining how to use the key? Or how to install the lock?

Seriously, what do figures A, B, D, E and F mean? 
I have no clue. 


Whatever.  It was getting too dark and too chilly to redo it on Saturday so I risked not having the back door locked. Fortunately the bears are asleep so I was safe.

Sunday I undid the set screw, removed the lever, took off the trim piece, pulled the whole sucker apart and started over WITH the key installed.
Guess what? It worked.


The door needs painting inside and out but at least the doorknob is tight. 

The door knob is secure.
The cabin is secure.
Knowledge is power.

Want to see more projects? Click here and here and here and here. I need Lowe's or Home Depot to sponsor me at this point.


Also... I finished my vanity. It's awesome. That chalk paint can be addictive.  Quick to paint, quick to dry, simple to finish. I'm eyeing a couple of other pieces of furniture for re-do status now.


The finished vanity. 
Isn't it cute? 
(I cropped out the paint splash.)


Love these fan pulls. 
I was hoping they were brass, but no.
After lots of polishing I thought to try the magnet test on them.
The magnet stuck, so not brass.
But still cute. 

Next up?  My office/sewing room. What a disaster.

22 January 2018

Monday at 8:29pm

Monday, 8:29pm

Well, the plan was to do a post on finding my voice, on learning to speak up for myself, on making myself heard. And I can hear the moans from my mother, among others...."O Lord, that girl does NOT need to find her voice."  But. But. I guess I really could not find my voice. Or find the right way to get the words on paper so they made sense and made a point.

Because it is something I am working on. I've been told more than once recently that I am "too nice". I've caught myself smiling and nodding when my brain is thinking "Hell, no! You did NOT just say what I think you did."   Part of that is being at work where I am paid (meagerly, but paid none the less) to be the smiling face at the door that greets people. Part of that is my nature. And I have realized recently that a lot of it is how I was raised. Not to say I was raised meek, but more raised in the ways of the times.

Me. On my birthday.
Smiling and greeting all the patients. 
And being agreeable. 
Even to the jerks.


Of course I also believe I am extremely independent and a decent writer and very capable and also very tall.   Some of the above facts are not actually true. They are "alternative facts."   That's ok. Apparently alternative facts are just as good as real ones these days.

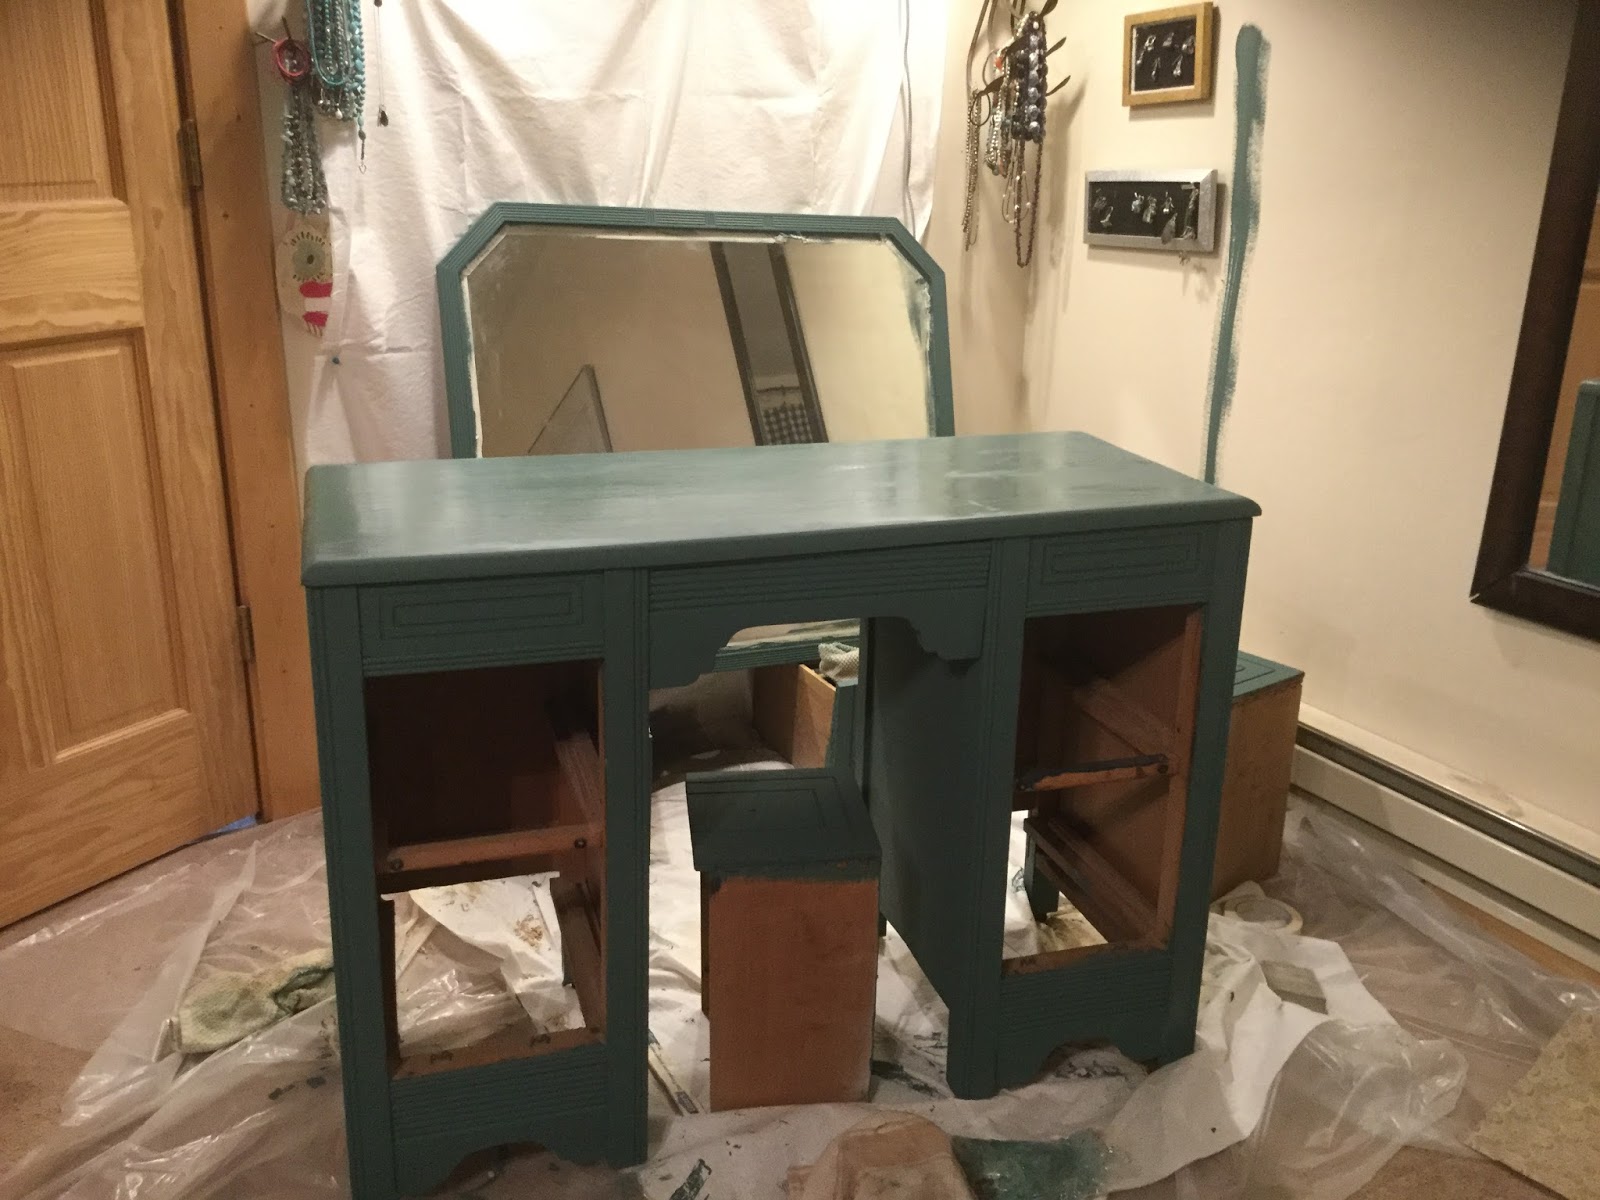
So...instead of writing about how I haven't found my voice but am trying to, I will update you on my most recent project: Painting the vanity and mirror.

It was going to be a charcoal gray to complement the light gray bed. Then Neighbor Sue mentioned how much she liked the original color and how well it went with the gray. And Neighbor Sue is the Queen of Color. Mostly PINK!  That got me to thinking. The teal is really pretty and one of my favorite colors. It plays nicely with the gray and would be happy with some pink and navy thrown in.

The starting point which is going to be pretty similar to the ending point. 
Only better. 

An almost identical teal was found at Lowe's. The mirror has been painted and the first coat of wax applied. The top layer of wax will be darker to bring out the grooves of the wood.
The plan is to paint the wall behind the bed navy. Friend Liddy's suggestion. (This is decorating by sorority. A sorority with no dues. Ha! As if.)   That should make the light gray bed pop.


Imagine the wall behind the bed is navy. 
Pretty, yes? 

Hey! The whole room might get painted navy. It's a big space with maybe enough light to pull it off.
Anyway, I'm painting away IN  THE BEDROOM because the basement is just too chilly. Drop cloths have been strategically placed over the carpet and running up one wall. Paint is applied with care.

Then.

I learned a lesson.

If you are going hold the paint can, make sure you have a really good grip on it.

Otherwise, this happens:

 Yep. 
That's a stripe of teal paint on the wall, the wall heater, the drop cloth.
And a puddle of paint on top of the vanity. 
 But not on the carpet.


The paint can slipped from my hand, dropping straight down about 10" to  the top of the vanity. And splashed. All the way over to the wall.  The vanity top now has a fairly heavy coat of paint on it. And the wall will definitely be painted navy sooner rather than later. Miraculously the carpet is still beige.


In spite of my carelessness, the painting is coming along nicely.

Soooo, even though that was a big mishap and now there's a great big line down the wall, it got me to thinking.   Can't find my voice, but I can give some solid advice:
Hold on tight.
Take that as you wish.


••••••••••••••

I also spent the morning/ day trying to get tickets to see Hamilton in Denver. I followed all of the rules, logging in at 9:00am to get in line in the virtual waiting room. At 10:00am I was given the number in line of 71,415. Googling the number of seats in the theater, multiplying that by the number of days the show would be running and well....there would be no tickets for me. Determined to hang in there, I switched from the big computer to the iPad and somehow lowered my number in line to 27,271. That sounded possible. Maybe some people would give up. Or miss their spot, as once your number came up, there was a 15 minute window to order tickets.  But no.
Instead I got this:


It's definitely been a Monday.  Maybe I should just call it a day and go on to bed. 


27 April 2016

I Think I Can...

I Think I Can, Therefore I Can...


I've possibly mentioned before about a thousand times that the Texas house became beyond neglected while I was in Colorado. Apparently guys just don't see "stuff".

Eighteen months ago when I was in town I tackled the upstairs bathroom that 16 years ago we foolishly thought three kids could share. They did share but not without a fair amount of drama, most of which is still ongoing. Standards of cleanliness vary between the male and female children.

But anyway, the girls and I started stripping the original, very tired wallpaper and then after we were also very tired we gave up the stripping and just sealed the stuff. Over the last 16 years the wallpaper had become "one" with the  sheetrock underneath.

Original wallpaper.
Lovingly removed in 3" strips.

That paper around the mirror was NOT going to come off.  Once I came down from the chemical high from the oil based sealant, the Boy and I learned to texturize walls.

Wallpaper gone, walls textured
and painted. 
HUGE improvement.


YouTube is a wealth of information.
So are knowledgeable friends.

Then we painted. At some point a glass shower door was installed by the male inhabitants here. This was a very good thing since over the years, the knowledge of how and why to use a shower curtain had waxed and waned within my kiddo's heads.

Which gets me to this weeks project.
Baseboards.
The geniuses that built this house used MDF baseboards everywhere, including the wet areas of the house. MDF is Medium Density Fibreboard which is supposedly a pressed wood product. I'm pretty sure the stuff in that bathroom was pressed paper. No matter the composition, once wet this stuff expands. And cracks.


The baseboards in all the bathrooms are cracked and peeling. Shower curtains and sink drains are NOT idiot-proof.

I neglected to take a pic of the upstairs trim but "fortunately" 
the downstairs bathroom trim has the same problem. 
Cracked, separating, peeling paint.
If you don't put the shower curtain in, 
or if you plug the sink, turn on the water 
and get in the shower, the bathroom will flood.

Yesterday I decided I could replace baseboards. Removing them should be a snap- cut the caulk line with an Exacto-knife then pry them off. With only 14 linear feet of wall space involved, this should take 20 minutes tops.

Four hours later I was done.

Builder Bob had installed the baseboards, putting the finish nails low to the subfloor, THEN installed the tiles. And grouted. And caulked. With the swelling over the years from water exposure, those baseboards were in there TIGHT.

No problem, I figured I could pry them out.  Forty minutes into the first 30" run on the first wall, I almost gave up. I figured I just wasn't strong enough.  That had to be the problem because the boards would NOT come out of their gap.

I took a break, ate lunch, regrouped. Decided I had to be strong enough, there was another problem.

That was when I discovered those very low- now below the level of the tile- nails that were holding the trim back. Aha! Those rats.  I couldn't pull them out but I could sneak the needle nose pliers down between the wall and the trim and twist those suckers out.

Like I said, four hours later the baseboards were gone. I was left with huge gaping holes between the floor and walls.

Like the wallpaper, the trim also came off in 3" strips. 
What a mess. 

BUT!!
I did not put the hammer through any walls, I did not crack the toilet or the bathtub and I did not have to make even one trip to the Emergency Room for stitches. So I consider that a win.

This morning I mixed up some grout that will not match even though the color name is the same. I've just resigned myself to that fact and am hoping it won't matter. I stuffed a whole box of grout into those gaps and am waiting for it all to dry. (And maybbbbeeeeee turn into the correct color? Nah. Won't happen.)

Was I using the correct tools? Wait? Fingers aren't the correct tools?
No...
Do I care?? No....

Wiped the edges down, waiting for the haze to dry.
Yep, messed that wall up a little.

I've given the new baseboards a coat of enamel paint.  Tomorrow I will cut and nail and caulk.

Linen Enamel Paint. 
Probably the trim color for 90% of the houses in Sugar Land.

The moral of this story? If it isn't perfect it will still be an improvement on what was there.
If I think I can, then I probably can.
Project Sixty by Sixty was conceived with the idea that you are never too old to learn or try something new.

•••••••••••••••••••••••••••••••••••••••••••••••••••••


A BFI. (My friend Cherrilla taught me this term.  Short for Big F**king Idea.)

HGTV needs to hire me to be the Nicole Curtis of the "over 60 home remodeling" set. I could learn on the job how to do all this stuff that requires skill and practice but is NOT brain surgery.

I will need some hunky helpers, please.
••••••••••••••••••••••••••••••••••••••••••••••••••••

Hopefully the finished project will be on next week's blog. Hopefully.